Before configuring Visual Studio Code, the PHP CLI and PHP-XDEBUG must be present on your system. If you haven’t installed them yet, follow the steps described here for Windows or here for Linux.
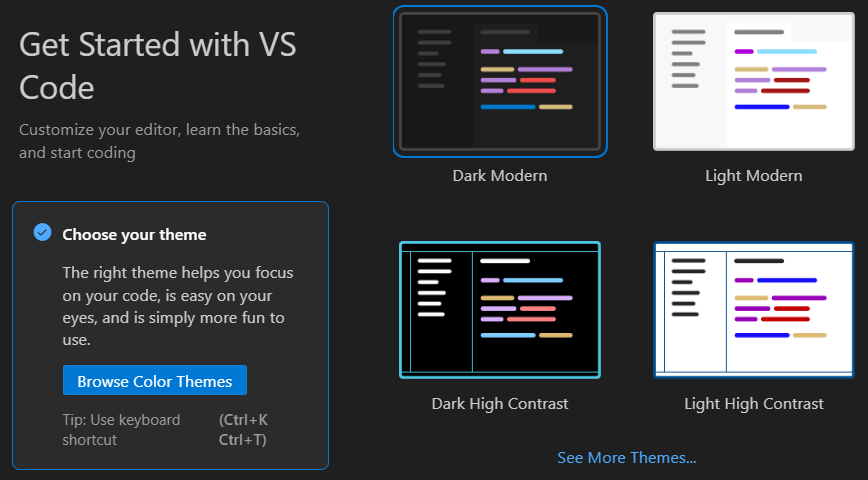
If you have successfully installed PHP CLI, PHP-XDEBUG and Visual Studio Code, open Visual Studio Code, and choose the theme you want (Figure 1). Then, click on the “Mark Done” button.
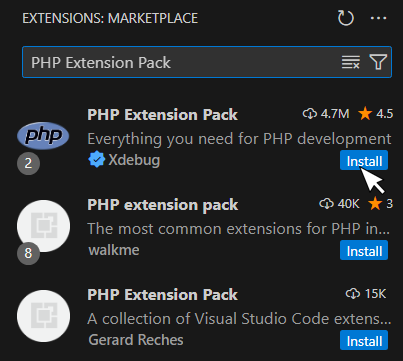
Click on the “Extensions” ![]() button in the Activity Bar on the left. In the Side Bar that opens, search for “PHP Extension Pack”, click on the “Install” button (as shown in Figure 2) and wait for the installation to complete. It is advisable to install the “PHP Extension Pack” that is developed by “Xdebug”.
button in the Activity Bar on the left. In the Side Bar that opens, search for “PHP Extension Pack”, click on the “Install” button (as shown in Figure 2) and wait for the installation to complete. It is advisable to install the “PHP Extension Pack” that is developed by “Xdebug”.
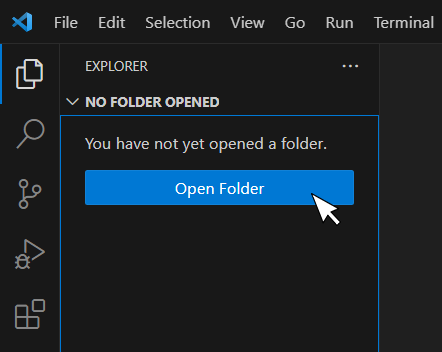
Next, you must add a folder to the workspace. Click on the “Explorer” ![]() button in the Activity Bar on the left. In the Side Bar that opens, click on the “Open Folder” button, as shown in Figure 3.
button in the Activity Bar on the left. In the Side Bar that opens, click on the “Open Folder” button, as shown in Figure 3.
Open (select) an empty folder where your projects should be stored. If a popup window opens asking you if you trust the authors of this folder, you should click on the “Yes, I trust the authors” button.
Notice: It is a good idea to create a folder named “VS Code PHP Projects” in your Documents folder and add that folder to the workspace.
If you are using Windows, you need to set the path to the “php.exe” file for both PHP validation and debugging. This step is not necessary for Linux distributions. From the main menu, click on File → Preferences → Settings and click on the “Open Settings (JSON) ![]() button on the top right corner of Visual Studio Code. In the “settings.json” file that opens, add the following lines
button on the top right corner of Visual Studio Code. In the “settings.json” file that opens, add the following lines
{
    "php.validate.executablePath": "C:/PHP/php.exe",
    "php.debug.executablePath": "C:/PHP/php.exe"
}
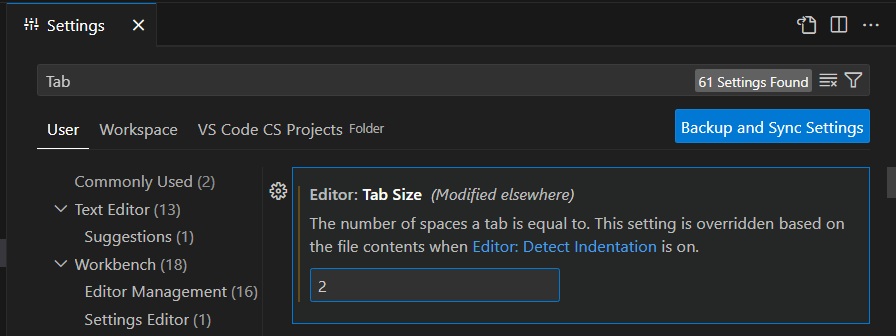
One thing that I do in my books in order to save paper is to decrease the number of spaces per indent to two. From the main menu, click on File → Preferences → Settings. Search for the keyword “Tab”. Select “Text Editor” on the left, as shown in Figure 4, and set the field “Editor: Tab Size” to 2.
Finally, from the main menu select “Run → Add Configuration…” and click on the “PHP” debugger, as shown in Figure 5.
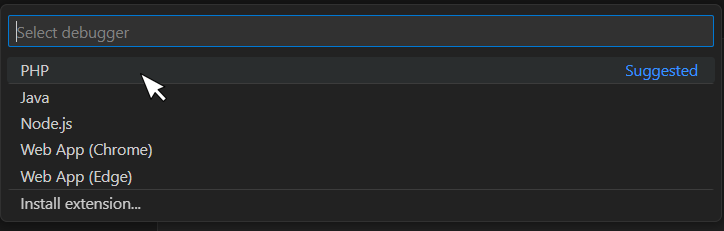
Once the “launch.json” file is created (see below), keep only the “Launch currently open script” configuration, as shown. For Windows users, you must also add the “externalConsole”: true option.
{
  // Use IntelliSense to learn about possible attributes.
  // Hover to view descriptions of existing attributes.
  // For more information, visit: https://go.microsoft.com/fwlink/?linkid=830387
  "version": "0.2.0",
  "configurations": [
    {
      "name": "Launch currently open script",
      "type": "php",
      "request": "launch",
      "program": "${file}",
      "cwd": "${fileDirname}",
      "port": 0,
      "externalConsole": true,
      "runtimeArgs": [
        "-dxdebug.start_with_request=yes"
      ],
      "env": {
        "XDEBUG_MODE": "debug,develop",
        "XDEBUG_CONFIG": "client_port=${port}"
      }
    }
  ]
}
Save and close the “launch.json” file.
Visual Studio Code has been configured properly! Now it’s time to conquer the world of PHP!