XAMPP is a free-of-charge package of open source applications. It includes a web server, an ftp server, a mail server, and the CLI version of the PHP interpreter that this book requires. Of course, XAMPP can be installed on different platforms such as Windows, Linux, and Mac OS X.
The acronym XAMPP stands for
- X (pronounced “cross”) – This means “cross-platform,” because the package can be operated on different platforms
- Apache – This is a web server
- MySQL – This is a database server
- PHP – This is a programming language
- Perl – This is a programming language
In order to install XAMPP, you must download it free of charge from the following address:
Choose the version that is suitable for your platform. This article shows the process of installing XAMPP on a Windows platform. When the download completes, run the setup and when you are prompted to select the components you want to install, you can keep and install all the proposed components or you can check only those proposed in Figure 1.
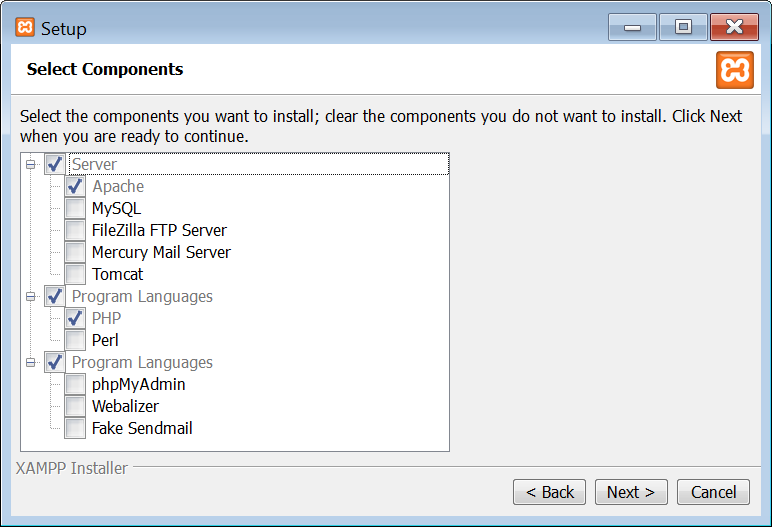
Figure 1 Selecting the components
When you are prompted to select the destination folder, it is advisable to leave the proposed “c:\xampp” as shown in Figure 2. Especially for Windows Vista, Windows 7, and Windows 8, problems may arise due to the lack of writing permissions on folders other than the one suggested.
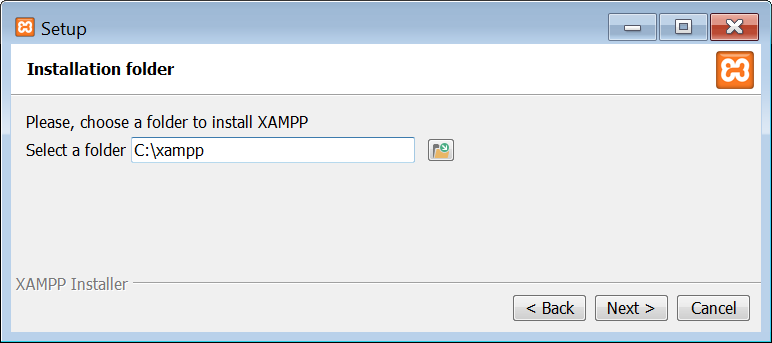
Figure 2 Selecting the destination folder
When the installation process is complete, you will need to make some modifications to the PHP configuration file. Using the Windows Notepad application or any equivalent text editor (for example, Notepad++), edit the “C:\xampp\php\php.ini” file. Find the [XDebug] section (usually at the end of the file) and uncomment some lines by removing the semicolon ( ; ) from the beginning of the lines as shown here.
[XDebug]
zend_extension = "C:\xampp\php\ext\php_xdebug.dll"
;xdebug.profiler_append = 0
;xdebug.profiler_enable = 1
;xdebug.profiler_enable_trigger = 0
;xdebug.profiler_output_dir = "C:\xampp\tmp"
;xdebug.profiler_output_name = "cachegrind.out.%t-%s"
xdebug.remote_enable = 1
xdebug.remote_handler = "dbgp"
xdebug.remote_host = "127.0.0.1"
xdebug.trace_output_dir = "C:\xampp\tmp"
Save your changes and close the text editor.
Notice: If [XDebug] section is not present in your php.ini file, just add it manually.
Notice: If php_xdebug.dll file is not present in your C:\xampp\php\ext\ folder, download it from here.
Your PHP interpreter is now ready to use. However, one last thing has to be done. You must install NetBeans and configure it so you can use the CLI version of the PHP interpreter. Once you do this, you will be able to write your PHP scripts and execute them directly from NetBeans.