Let’s see how to enter programs into the computer, execute them, see how they perform, and see how they display the results.
The first thing you must do is create a new Python project. Eclipse provides a wizard to help you do that. Start Eclipse, and from its main menu select “File → New → PyDev Project” as shown in Figure 1.
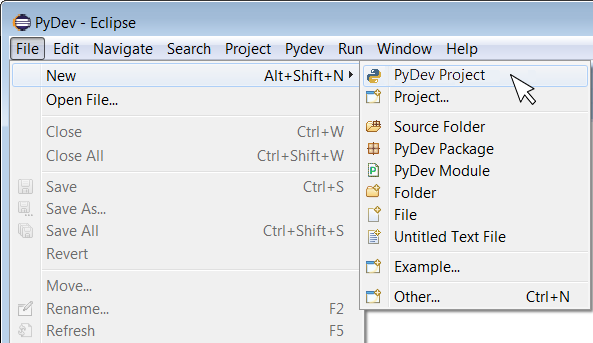
Figure 1 Starting a new Python project from Eclipse
If there isn’t any such option in your Eclipse, you can alternatively select “File → New → Other” and in the popup window that appears, select the “PyDev Project” wizard as shown in Figure 2. Then, click on the “Next” button.
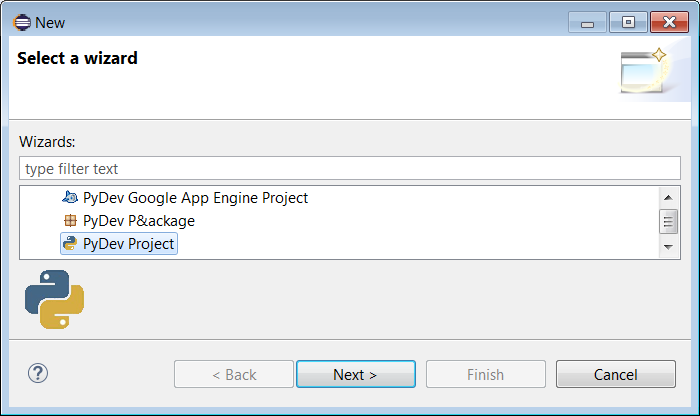
Figure 2 Selecting the “PyDev Project” wizard
The “PyDev Project” dialog box appears, allowing you to create a new PyDev Project. In the “Project name” field, type “testingProject” and in the “Grammar Version” field select the option “3.0” (or later) as shown in Figure 3.
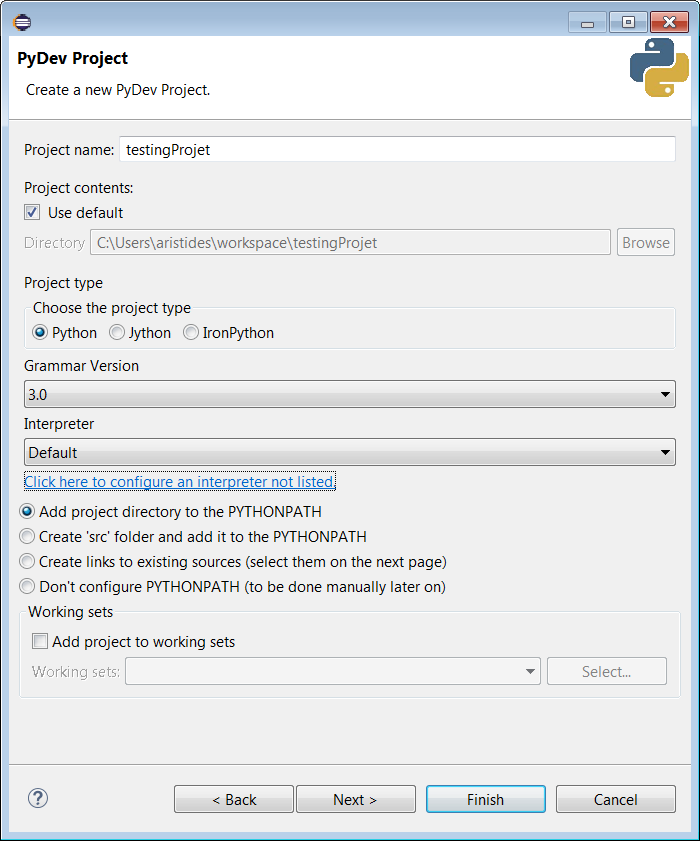
Figure 3 Creating a new PyDev Project
Notice: If the error message “Project interpreter not specified” is displayed in the “PyDev Project” dialog box, you must click on the link “Please configure an interpreter before proceeding.” Then, in the popup window that appears click on the “Quick Auto-Config” button.
Click on the “Finish” button. If the popup window of Figure 4 appears, check the “Remember my decision” field and click on the “Yes” button.
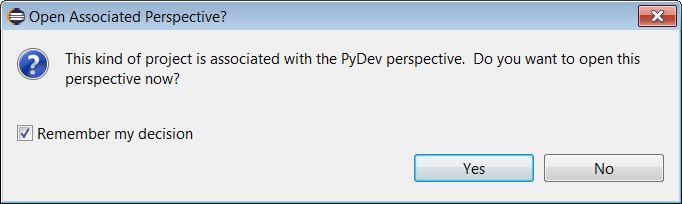
Figure 4 Opening Associated Perspective
The project is created in your Eclipse environment. If the “PyDev Package Explorer” window is minimized, click on the “Restore” button (shown in Figure 5) to restore it.
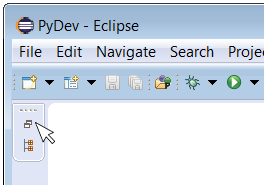
Figure 5 Restoring the “PyDev Package Explorer” window
In the “PyDev Package Explorer” window, select the “testingProject” that you just created and from the main menu select “File → New → PyDev Module”. If there is no such option in your Eclipse, you can alternatively select “File → New → Other” and in the popup window that appears, select the “PyDev Module” wizard. Then, click on the “Next” button.
In the popup window that appears (shown in Figure 6), make sure that the “Source Folder” field contains the value “/testingProject”. In the “Name” field, type “test” and click on the “Finish” button.
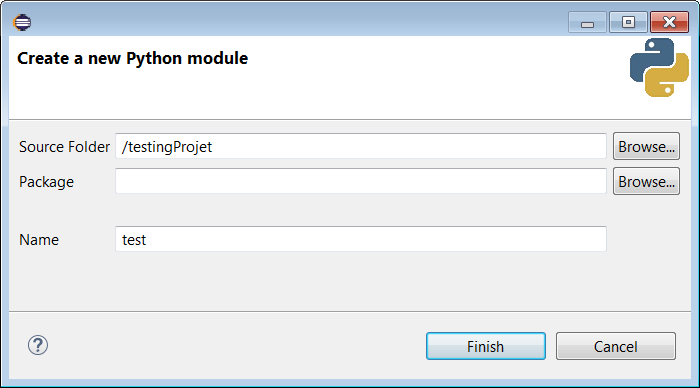
Figure 6 Creating a new PyDev module
If the popup window of Figure 7 appears, leave all fields checked and click on the “OK” button.
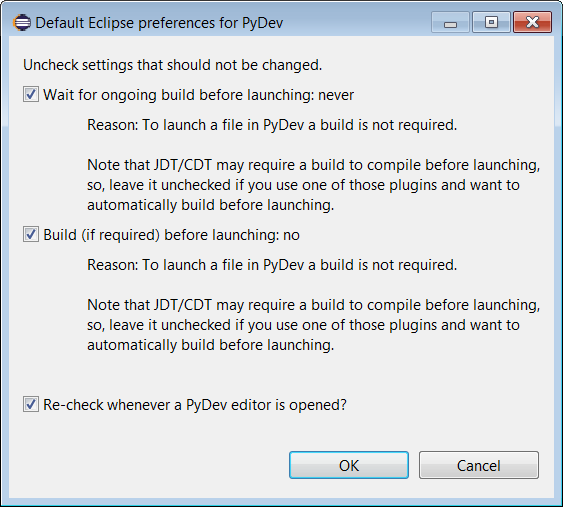
Figure 7 Selecting the default Eclipse preferences for PyDev
The next window that appears prompts you to select a template. Since you need no template you can just click on the “Cancel” button.
You should now see the following components (see Figure 8):
- the “PyDev Package Explorer” window, which contains a tree view of the components of the projects, including source files, libraries that your code may depend on, and so on.
- the “Source Editor” window with the file called “test.py” open. In this file you can write your Python code. Of course, one single project can contain many such files.
- the “Console” window in which Eclipse displays the output results of your Python programs, as well as messages useful for the programmer.
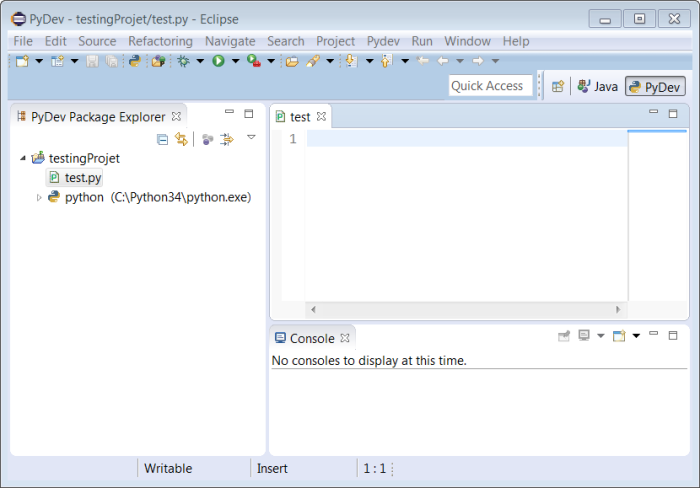
Figure 8 Viewing the “Package Explorer”, “Source Editor”, and “Console” windows in Eclipse
Notice: If the “Console” window is not open, you can open it by selecting “Window
→Show View→Console” from the main menu.