Before configuring Visual Studio Code, the Java Development Kit (JDK) must be present on your system. If you haven’t installed it yet, follow the steps described here.
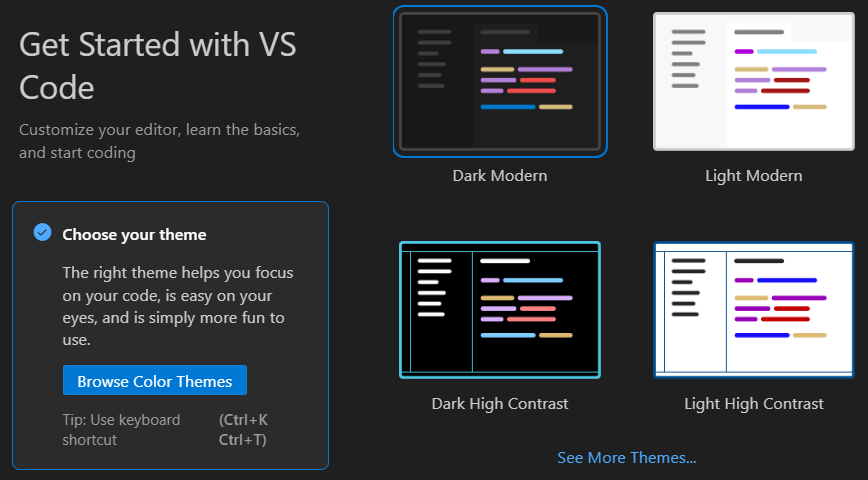
If you have successfully installed Java Development Kit (JDK) and Visual Studio Code, open Visual Studio Code, and choose the theme you want (Figure 1). Then, click on the “Mark Done” button.
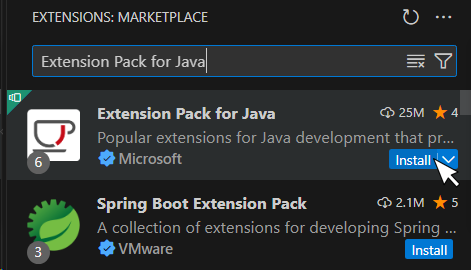
Click on the “Extensions” ![]() button in the Activity Bar on the left. In the Side Bar that opens, search for “Extension Pack for Java” developed by Microsoft (as shown in Figure 2), click on the “Install” button and wait for the installation to complete.
button in the Activity Bar on the left. In the Side Bar that opens, search for “Extension Pack for Java” developed by Microsoft (as shown in Figure 2), click on the “Install” button and wait for the installation to complete.
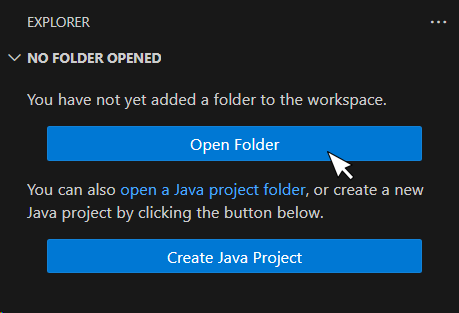
Next, you must add a folder to the workspace. Click on the “Explorer” ![]() button in the Activity Bar on the left. In the Side Bar that opens, click on the “Open Folder” button, as shown in Figure 3.
button in the Activity Bar on the left. In the Side Bar that opens, click on the “Open Folder” button, as shown in Figure 3.
Open (select) an empty folder where your projects should be stored. If a popup window opens asking you if you trust the authors of this folder, you should click on the “Yes, I trust the authors” button.
Notice: It is a good idea to create a folder named “VS Code Java Projects” in your Documents folder and add that folder to the workspace.
Visual Studio Code has been configured properly! Now it’s time to conquer the world of Java!