In order to install NetBeans IDE, you must download it, free of charge, from the following address:
https://netbeans.org/downloads/index.html
On the NetBeans web page, there is a dropdown list that lets you choose the required platform (Windows, Linux, or Mac OS X). Choose the platform that matches yours. This article shows the process of installing NetBeans IDE on a Windows platform.
From all the “download bundles” available on netbeans.org, select and download the one called “All.” When the download is complete, run the corresponding installer.
If you receive the message shown in Figure 1, it means that the Java SE Development Kit (JDK) was not found on your system. Please click here to download and install the JDK before proceeding with the NetBeans IDE installation.
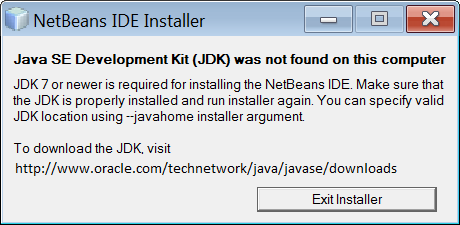
Figure 1 This message is displayed when the JDK is not found on your system
On the first screen of the NetBeans IDE installer, you can keep and install all the proposed packs and runtimes or you can click on the “Customize” button and check only those proposed in Figure 2.
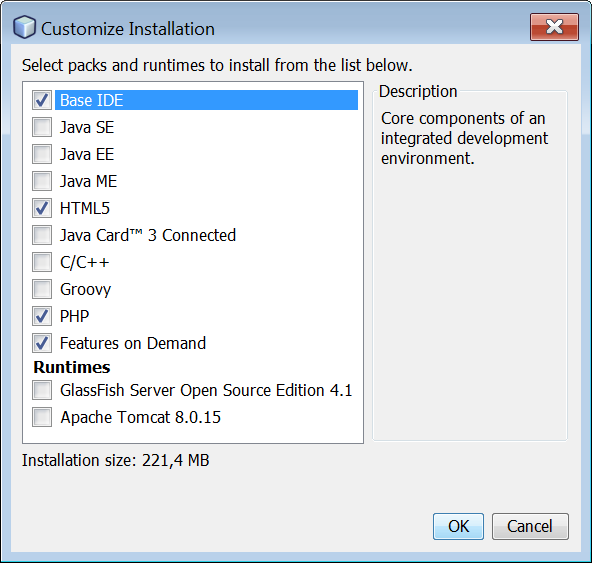
Figure 2 Selecting the packs and runtimes to install in the NetBeans IDE installer
Click on the “Next” button to go through the installation screens. When the license agreement shows up, you must read and accept the terms. The next screen prompts you to select the installation folder and the Java Environment. Leave the proposed folders as shown in Figure 3.
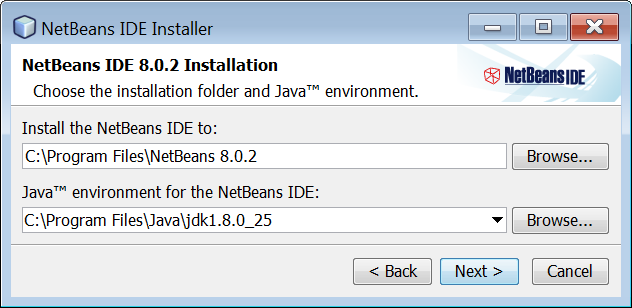
Figure 3 Selecting the installation folders in the NetBeans IDE installer
Notice: The installation folder and the Java environment proposed on your computer may differ from those in Figure 3 depending on the versions of the NetBeans IDE or JDK that you have.
On the next screen, leave the field “Check for Updates” checked, as shown in Figure 4. This option will automatically check for updates of installed plugins.
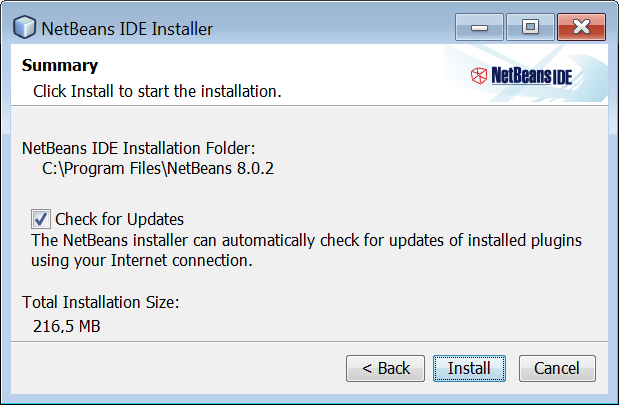
Figure 4 Selecting the box to check for updates
Click on the “Install” button.
When the installation process is complete, you will need to change some settings in order to let PHP scripts run directly from the NetBeans IDE.
Open the NetBeans IDE. The first screen that you will see is shown in Figure 5.
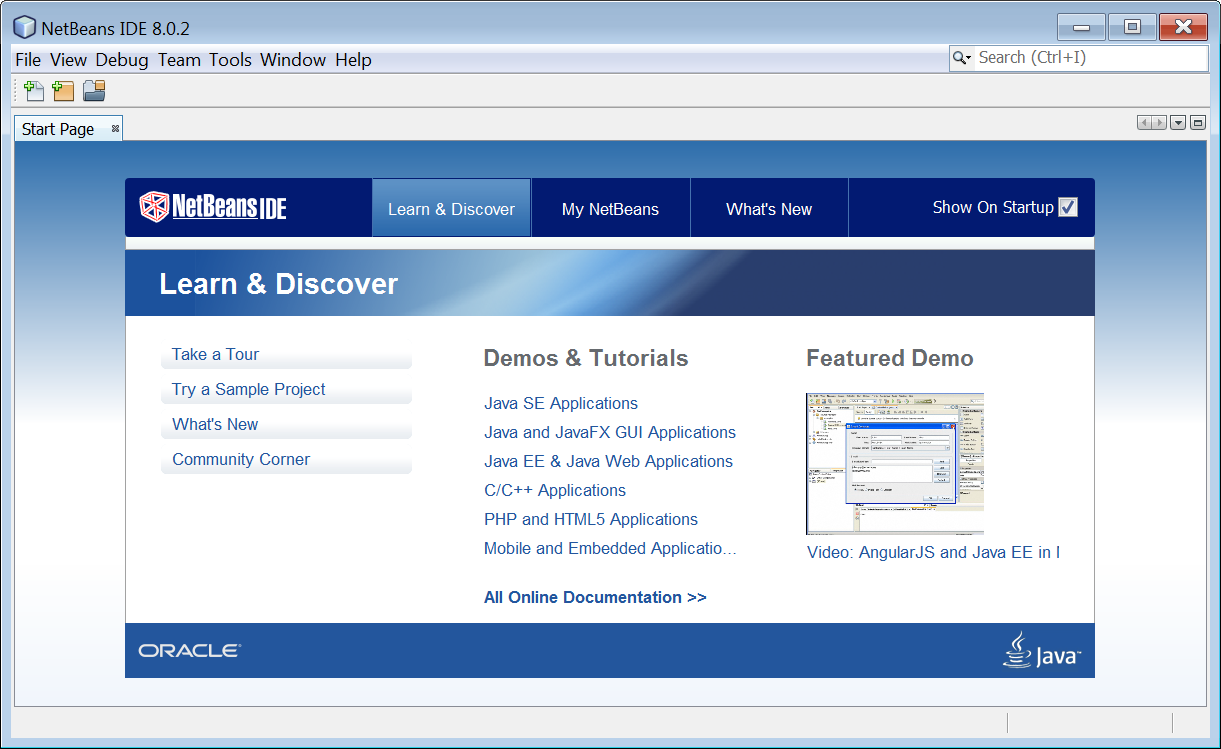
Figure 5 The NetBeans IDE start page
From the main menu select Tools → Options. In the popup window that appears, click on the PHP icon to open the PHP options dialog box, as shown in Figure 6.

Figure 6 The PHP Options dialog box
In order to use this functionality, you must activate support for PHP. Click on the “Activate” button. The window now becomes as shown in Figure 7.
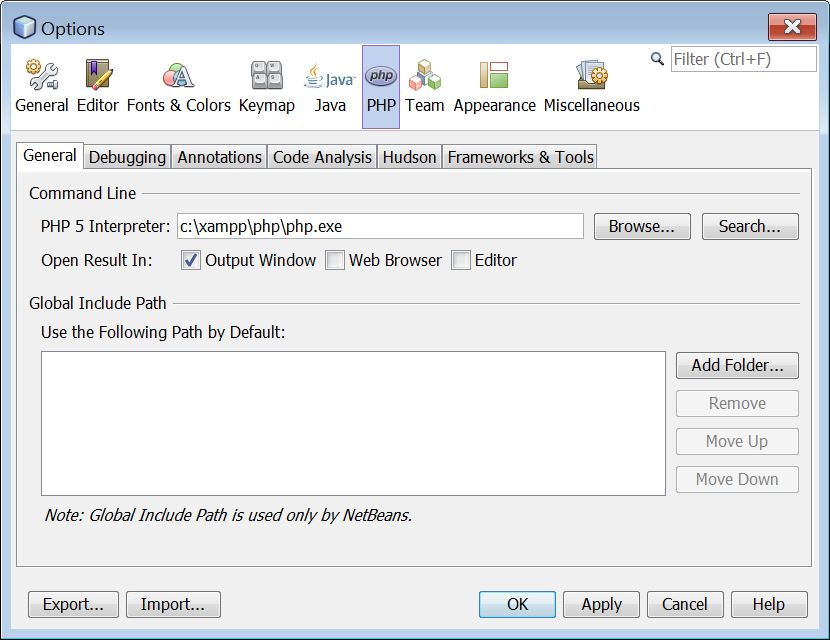
Figure 7 The PHP Options dialog box after PHP activation
In the “PHP 5 Interpreter” field, specify the path to the “php.exe” file. Use the “Browse…” or “Search…” button, if necessary. If you haven’t already changed XAMPP’s folder during the installation process, this path should be “c:\xampp\php\php.exe.”
Notice: If XAMPP is not installed on your system, read and follow the instructions shown here.
You can also change the number of spaces per indent to two by clicking on the Editor icon to open the Editor’s “Options” dialog box, as shown in Figure 8. On the “Formatting” tab, set the field “Number of Spaces per Indent” to 2.
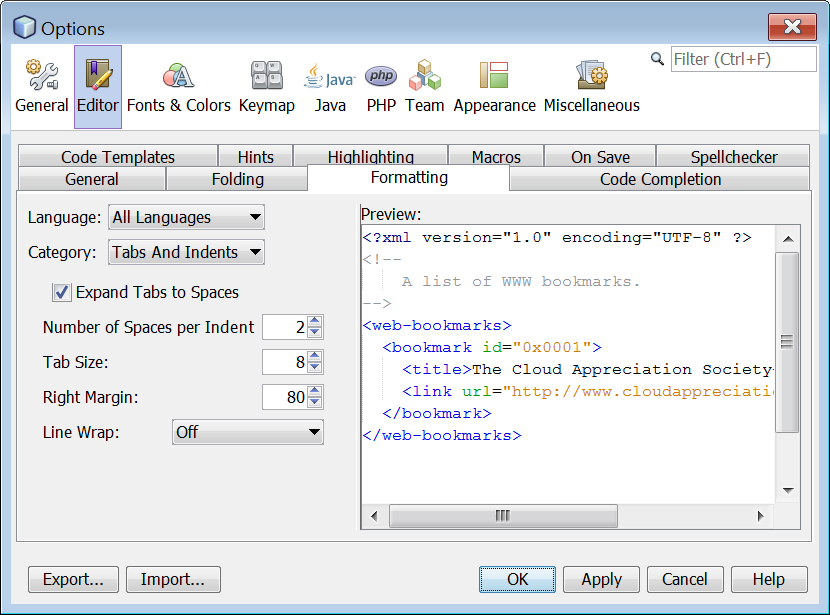
Figure 8 The Editor’s “Options” dialog box
Click on the “OK” button.
NetBeans IDE has been configured properly! Now you can conquer the world of PHP!