This step is for Windows users only and describes how to install:
- g++, the GNU C++ compiler,
- gdb, the GNU debugger, and
- Make, a utility for compiling and linking projects.
In order to install these tools, you must first download Cygwin. Cygwin is a large collection of GNU and Open Source tools that provide computers than run on Windows with a functionality similar to a Linux distribution. Download it, free of charge, from the following address:
https://cygwin.com/install.html
Choose either the 32-bit or the 64-bit version, depending on the version of your operating system, and download the corresponding setup file. When the download is complete, run the installer.
Click on the “Next” button to go through the installation screens. When you are prompted to choose a download source, choose “Install From Internet” as shown in Figure 1.
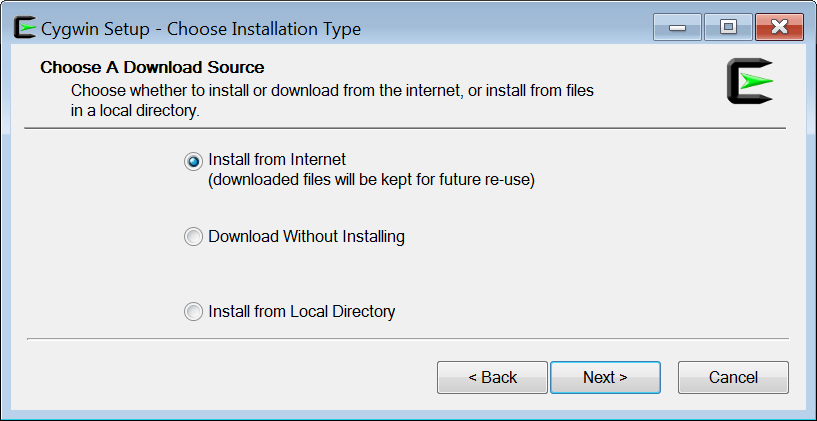
Figure 1 Choosing installation type
The next screen prompts you to select the installation folder. Leave the proposed folder, as shown in Figure 2.
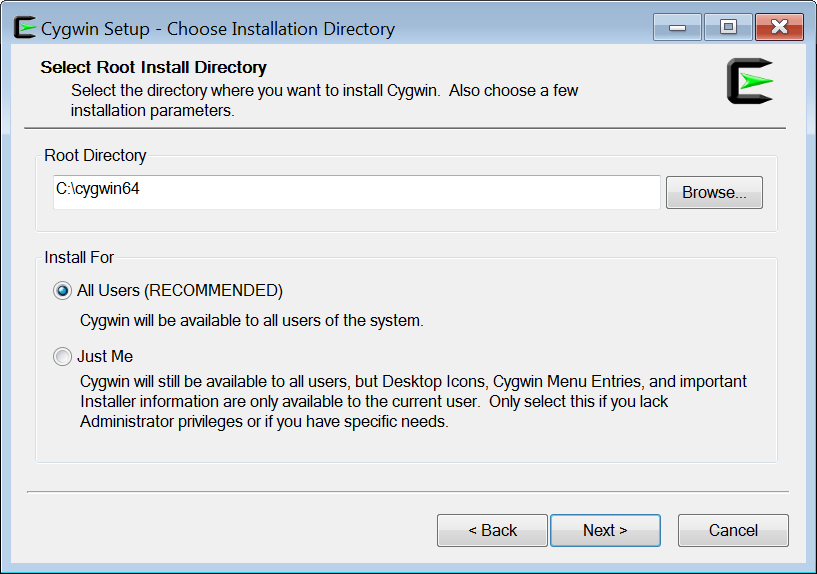
Figure 2 Choosing installation folder
The next screen prompts you to select the local package folder. Leave the proposed folder, as shown in Figure 3.
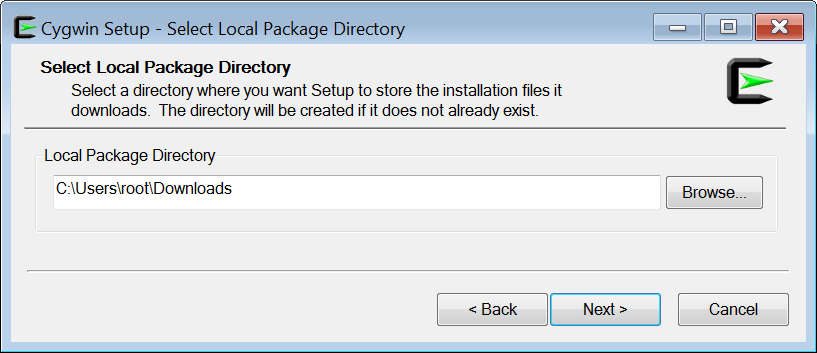
Figure 3 Choosing local package folder
The next screen prompts you to select the connection type. Make sure that the option “Direct connection” is selected, as shown in Figure 4.
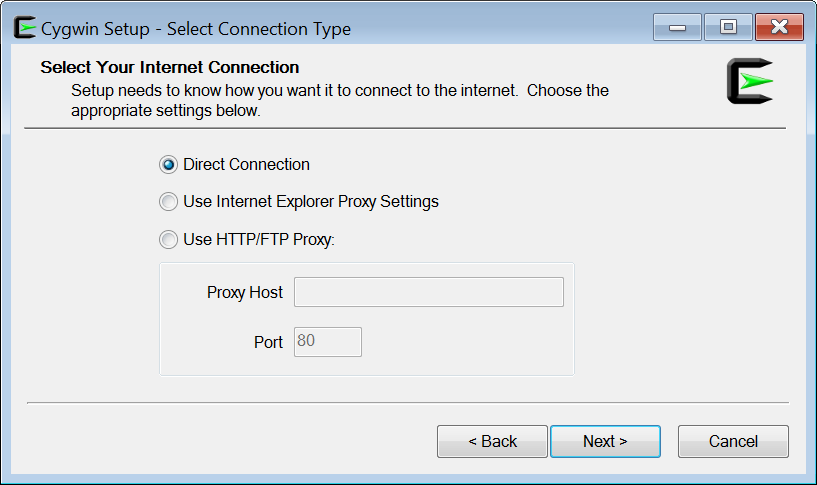
Figure 4 Choosing connection type
On the next screen choose the download site that is geographically the closest to you, as shown in Figure 5.
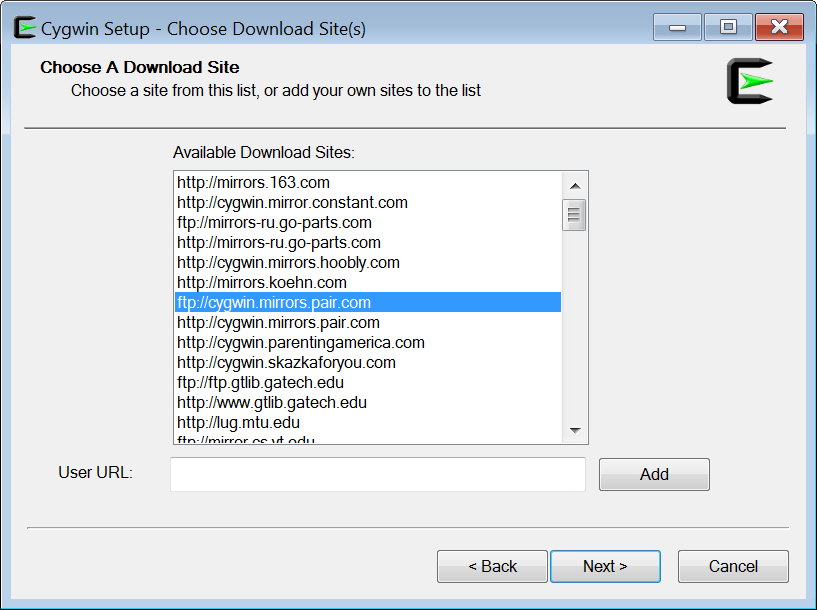
Figure 5 Choosing download site
After a brief delay, the next screen appears, asking you to specify the packages you want to install.
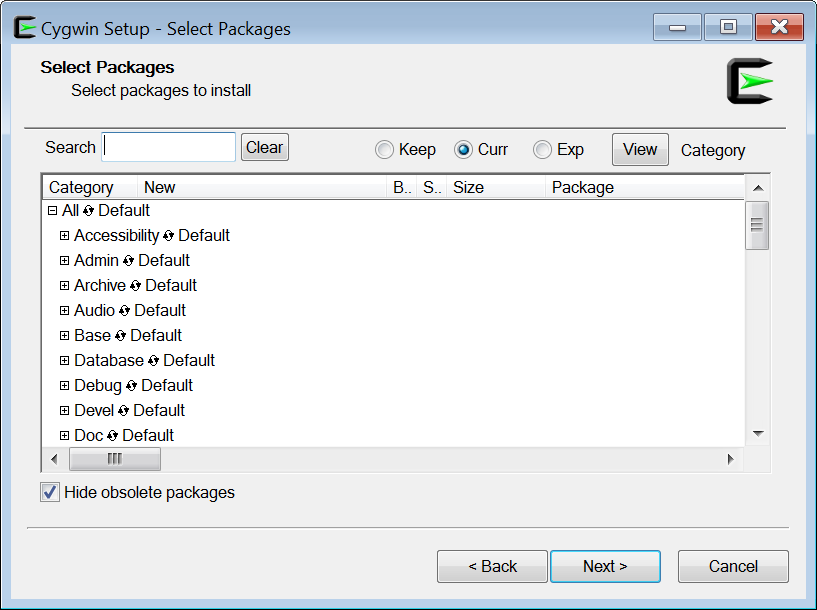
Figure 6 Choosing packages to install
Click the ![]() next to Devel, to expose the developer packages and do the following. Scroll down until you see the “gcc-g++: GNU Compiler Collection (C++)” and click on the “Skip” setting for this package to select it. You may probably need to click on the “Skip” setting two or three times, until you select the most recent version. Scroll down and click the “Skip” setting for two more packages: for the “gdb: The GNU debugger” and for the “make: The GNU version of the ‘make’ utility” as shown in Figure 7.
next to Devel, to expose the developer packages and do the following. Scroll down until you see the “gcc-g++: GNU Compiler Collection (C++)” and click on the “Skip” setting for this package to select it. You may probably need to click on the “Skip” setting two or three times, until you select the most recent version. Scroll down and click the “Skip” setting for two more packages: for the “gdb: The GNU debugger” and for the “make: The GNU version of the ‘make’ utility” as shown in Figure 7.
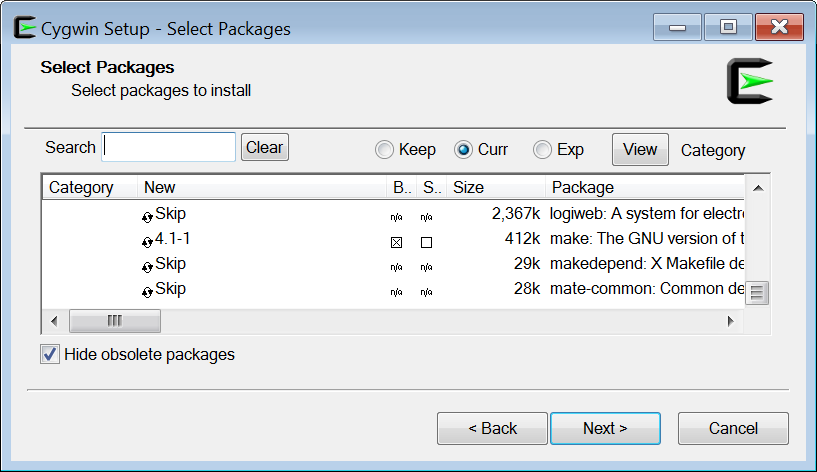
Figure 7 Choosing packages to install
With all required packages selected, you are finally ready. Click on the “Next” button. The next screen resolves dependencies. It recommends you to install some more required packages to satisfy dependencies. Leave the field “Select required packages” checked as shown in Figure 8.
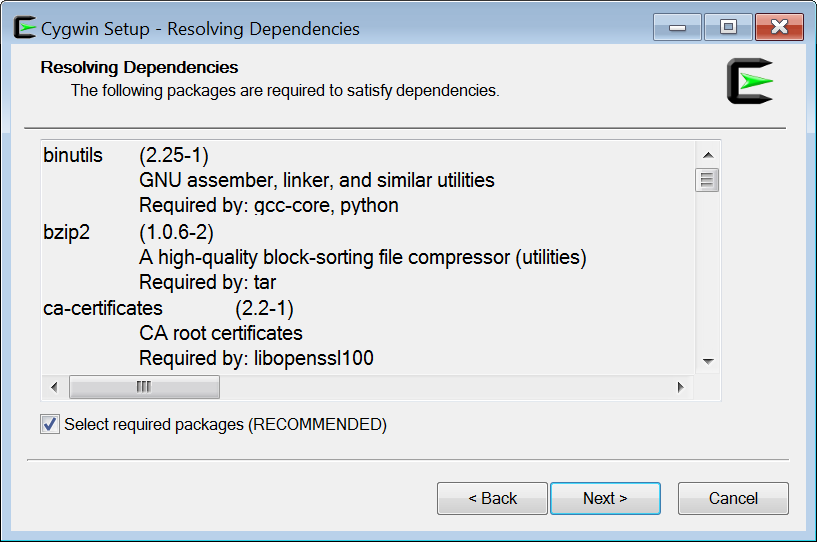
Figure 8 Resolving dependencies
Click on the “Next” button to begin the installation. When it finishes, click on the “Finish button” and an “Installation Complete” dialog appears; click on the OK button.