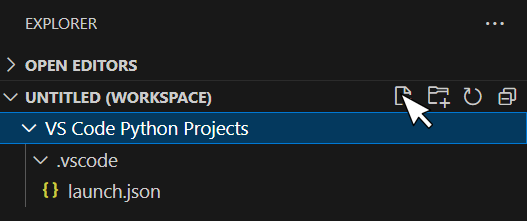
The first thing you must do is create a new Python module. You have already added a folder to the workspace (see here). It is probably named “VS Code Python Projects”. Click on the “Explorer” ![]() button in the Activity Bar on the left and select the folder “VS Code Python Projects”. In the Side Bar that opens, click on the “New File”
button in the Activity Bar on the left and select the folder “VS Code Python Projects”. In the Side Bar that opens, click on the “New File” ![]() option and create a file named “testingFile.py” (as shown in Figure 1).
option and create a file named “testingFile.py” (as shown in Figure 1).
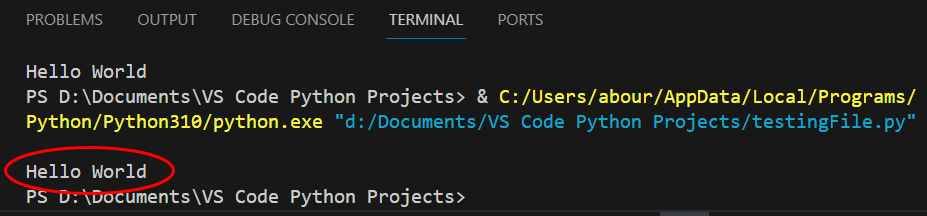
Now, write the following (terrifying, and quite horrifying!) Python program.
print("Hello World")
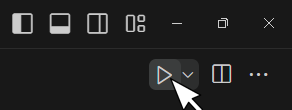
And now, let’s try to execute it! Click on the “Run Python File” ![]() icon in the top-right corner of Visual Studio Code.
icon in the top-right corner of Visual Studio Code.
The Python program executes, and the output is displayed in the “Terminal” window, as shown in Figure 2.
Notice: Alternatively, you can execute a file by selecting “Run → Run Without Debugging” from the main menu, or by hitting the CTRL + F5 key combination.
Congratulations! You have just written and executed your first Python program!
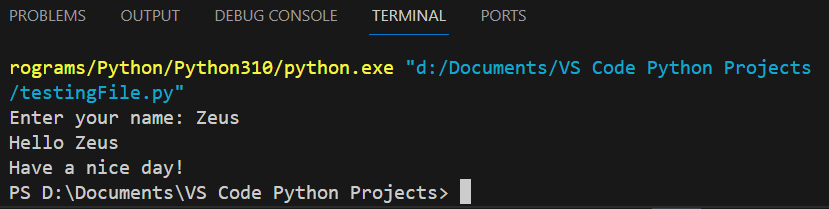
Now let’s write another Python program, one that prompts the user to enter their name. Type the following Python program into Visual Studio Code and hit CTRL + F5 to execute the file.
name = input("Enter your name: ")
print("Hello", name)
print("Have a nice day!")
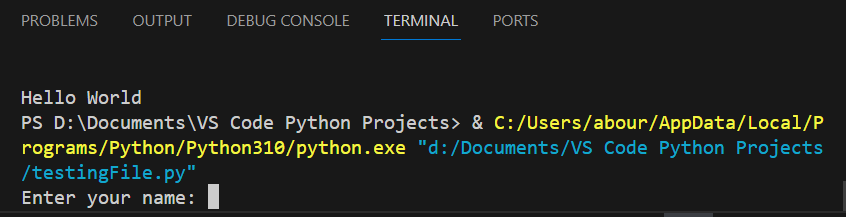
Once you execute the program, the message “Enter your name:” is displayed in the “Terminal” window. The program waits for you to enter your name, as shown in Figure 3.
Type your name and hit the “Enter ⤶” key. Once you do that, your computer continues to execute the rest of the statements. When execution is complete, the final output is as shown in Figure 4.