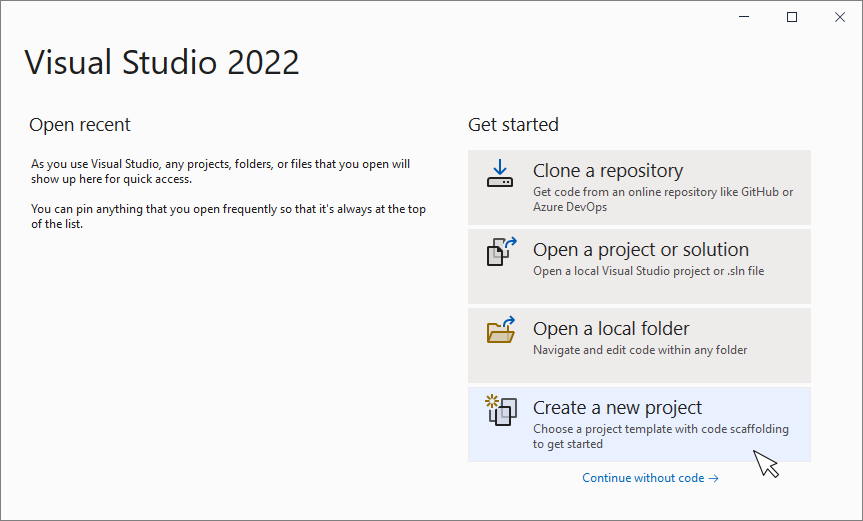
The first thing you must do is create a new Visual Basic project. Visual Studio Community provides a wizard to help you do that. Start Visual Studio Community and from the window that opens (Figure 1), click on the “Create a new project” button.
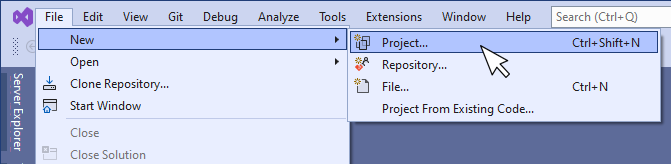
Alternatively, if you click on the “Continue without code” link, then, from Visual Studio’s main menu you can select “File → New → Project” as shown in Figure 2.
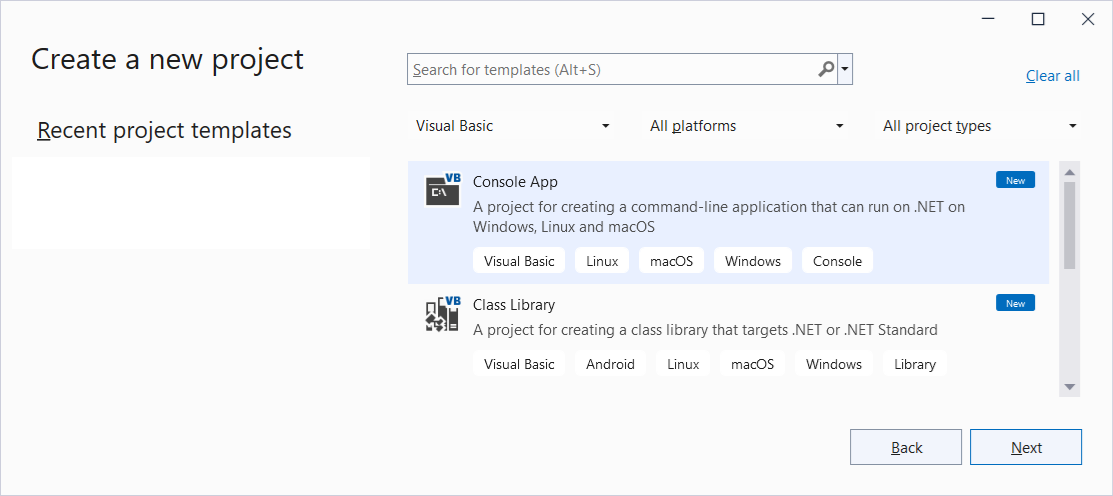
The “Create a new project” dialog box appears. In the right pane, select “Console App” (prefer the one that can run on .NET Core on Windows, Linux and MacOS) as shown in Figure 3, and click on the “Next” button.
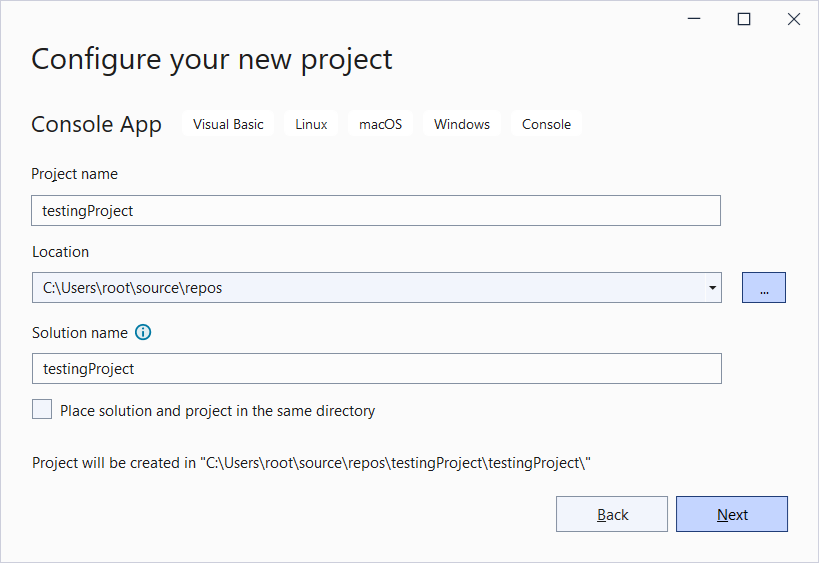
In the “Configure your new project” window that opens (see Figure 4), in the “Project name” field, you need to enter the name of your project. Type “testingProject” and click on the “Create” button.
In the next dialog box that appears, select the “.NET 8.0 (Long-term support)” framework.
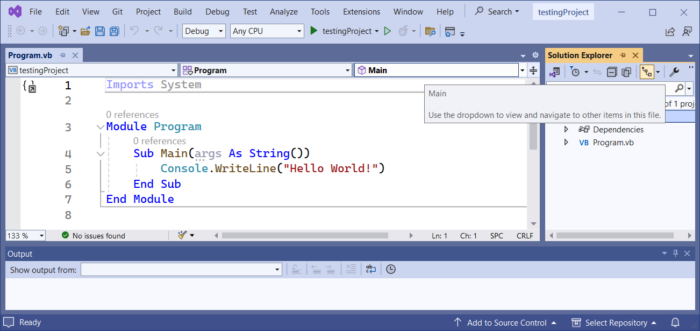
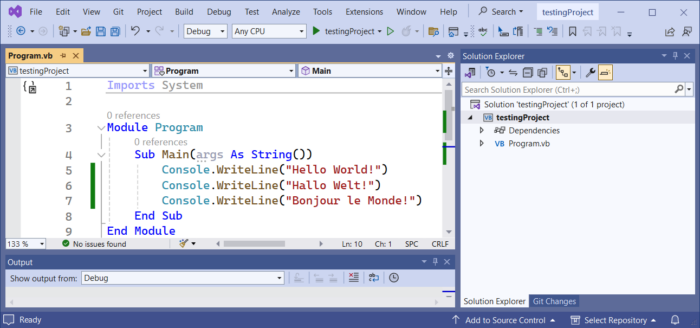
The project is created and opened in your Visual Studio environment. You should see the following components (Figure 5):
- the “Solution Explorer” window, which contains a tree view of the components of the projects, including source files, libraries that your code may depend on, and so on
- the “Source Editor” window with the file called “Program.vb” open. In this file you can write your Visual Basic code. Of course, one single project can contain many such files
- the “Output” window in which Visual Studio displays messages useful for the programmer
- other windows, such as the “Properties” window.
You have just seen how to create a new Visual Basic console project. Let’s now write the following (terrifying, and quite horrifying!) Visual Basic program and try to execute it.
Imports System

Module Program
  Sub Main(args As String())
    Console.WriteLine("Hello World!")
    Console.WriteLine("Hallo Welt!")
    Console.WriteLine("Bonjour le Monde!")
  End Sub
End Module
The statement that displays the English message “Hello World!” has been already entered for you automatically. Place your text cursor at the end of that line and hit the “Enter ⤶” key. Let’s try to type the second statement, the one that displays the German message “Hallo Welt!”. Type only the first character, “C”, from the Console statement by hitting the “C” key on your keyboard. A popup window appears, as shown in Figure 6. This window contains all available Visual Basic statements, and other items that begin with the character “C”.
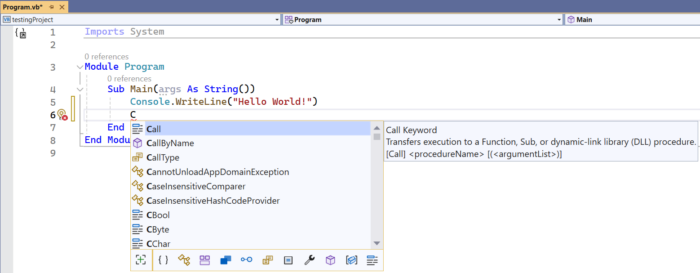
You can highlight a selection by using the up and down arrow keys on your keyboard.
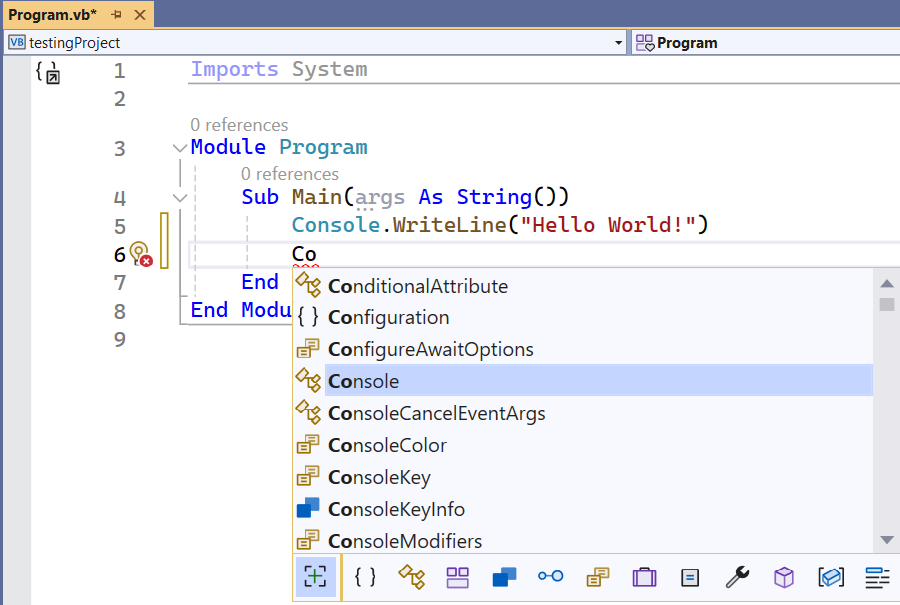
Type the second character, “o”, from the Console statement. Now the options have become fewer. Select the option “Console” using the down arrow key from your keyboard (if necessary), as shown in Figure 7.
Hit the period “ . ” key. The statement is automatically entered into your program. Select the “WriteLine” option as shown in Figure 8 and hit the “opening parenthesis (” key.
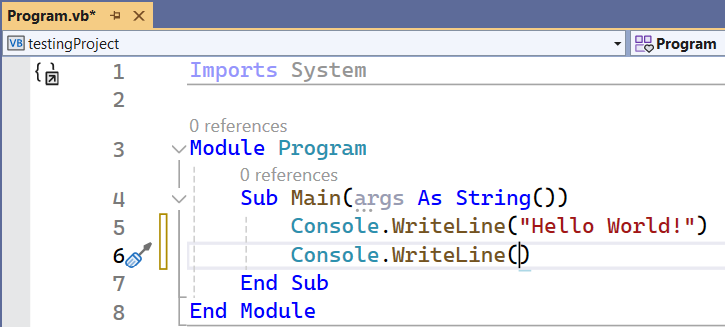
Complete the statement by writing Console.WriteLine("Hallo Welt!").Then, continue typing the rest of the Visual Basic program (as shown in Figure 9). Save the changes that you have just made. Your Visual Studio Code environment should look like this.
And now, let’s try to execute it! From the main menu, select “Debug → Start Without Debugging”.
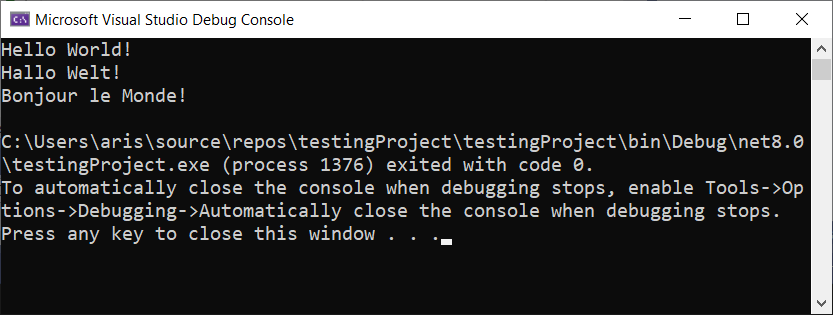
The Visual Basic program executes, and the output is displayed in the “Debug Console” window, as shown in Figure 10.
Notice: Alternatively, you can execute a file by hitting the CTRL + F5 key combination.
Congratulations! You have just written and executed your first Visual Basic program!
Notice: You should always save your changes before executing a program. To do so, from Visual Studio’s main menu you can select “File → Save” or hit the “CTRL + S” key combination!
Now let’s write another Visual Basic program, one that prompts the user to enter their name. Type the following Visual Basic program into Visual Studio and hit CTRL + F5 to execute the file.
Imports System

Module Program
  Sub Main(args As String())
    Dim name As String

    Console.Write("Enter your name: ")
    name = Console.ReadLine()
    Console.WriteLine("Hello " & name)
  End Sub
End Module
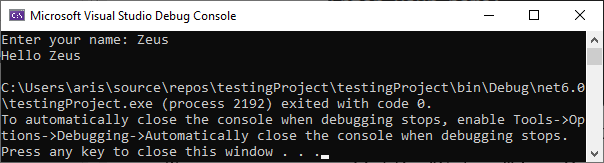
Once you execute the program, the message “Enter your name:” is displayed in the “Debug Console” window. The program waits for you to enter your name, as shown in Figure 11.

Type your name and hit the “Enter ⤶” key. Once you do that, your computer continues executing the rest of the statements. When execution finishes, the final output is as shown in Figure 12.
Press any key to close the window.